

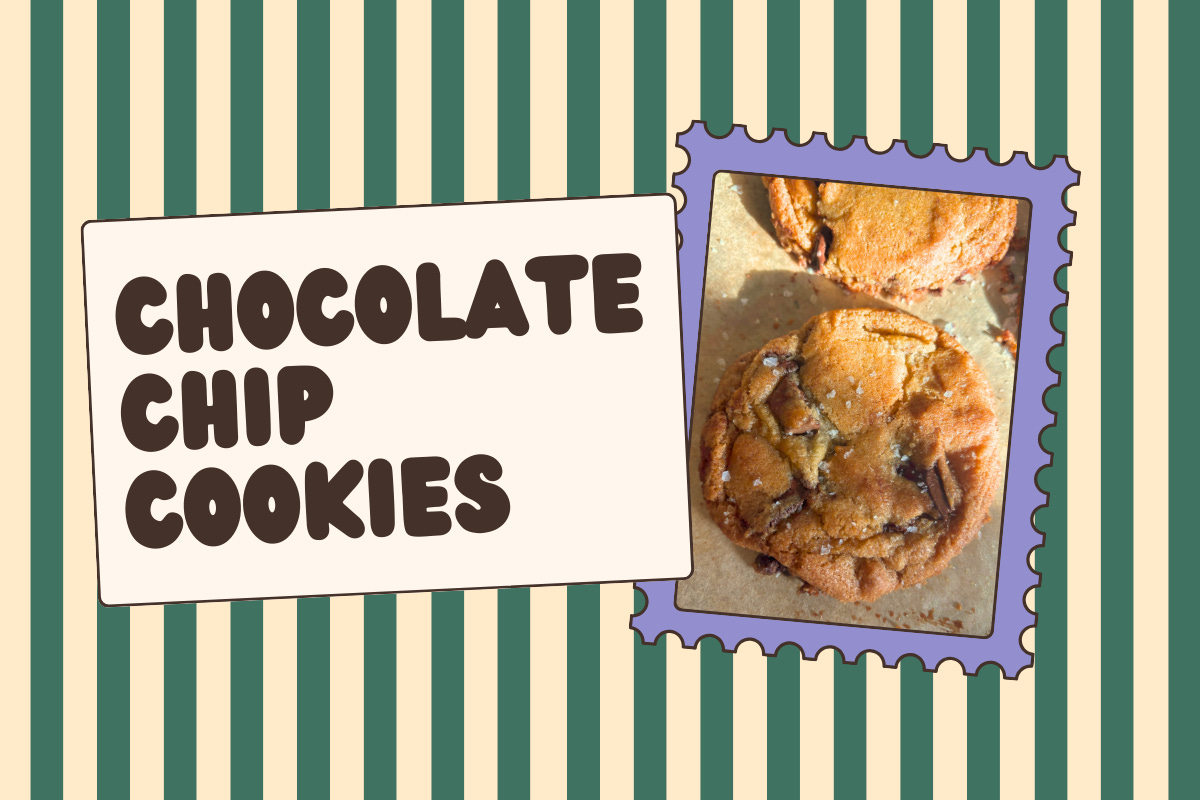
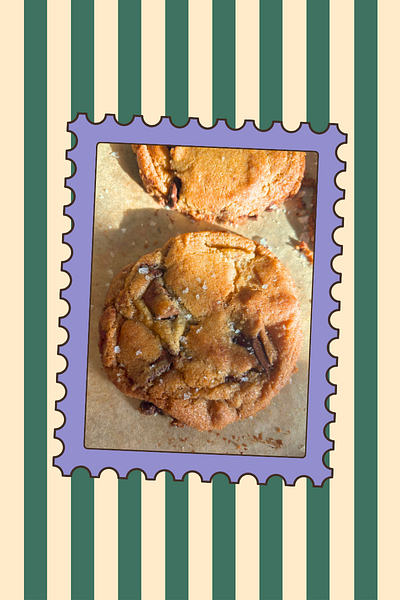
Kid Recipe: Chocolate Chip Cookies
A bakery-worthy cookie kids can make independently

When I ask kids what they like to bake, the answer is almost always the same: Chocolate chip cookies.
I don’t know why that’s always the answer. Maybe it’s because they’re familiar; maybe it’s because they’re delicious no matter what. But this recipe is for the kid who wants their cookies to be more than “good.” The goal is not to share these and hear: “Oh these are yummy, thanks.” The goal is to hear: “Wait. These are incredible. I need this recipe. YOU made these?”
The pride we feel when we hear a response like that and know we brought real joy to someone else is one of the best parts of sharing food with others. It’s more than just sharing dessert. You’re offering care. This is my favorite part of baking, and it’s a feeling I want others to experience too.
Yes, these are classic chocolate chip cookies. But they’re also a lesson in independence, perseverance, and doing something really well.
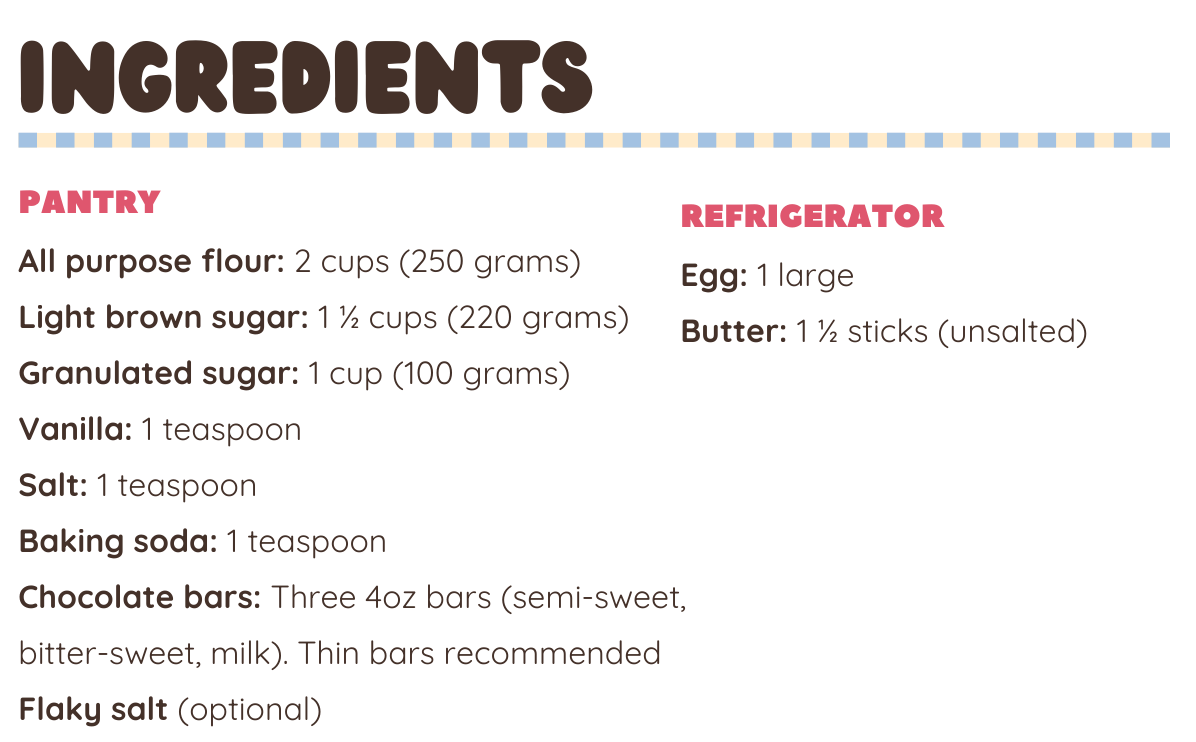


Chocolate: We’re using chocolate bars instead of chocolate chips. Most baking chips are designed to hold their shape. They contain additives that prevent them from fully melting. But a truly excellent cookie has uneven puddles of chocolate. To get that effect, kids will break the chocolate bars with their hands instead of chopping with a knife. It takes a little effort, but it’s safe, doable, and completely worth it.
You can mix types of chocolate—for example milk, semi-sweet, bittersweet for depth of flavor. I strongly recommend choosing baking chocolate that is thin so it is easier to break. (Baker’s is thick. Go with Giradella instead.)
Butter: We’re using one and a half sticks of unsalted butter. The exact measurement isn’t too important. Instead, it’s an opportunity to see fractions in action. Let your kid use a butter knife to find the halfway point on the stick and slice it in half. It’s a small moment of independence and a real-life math connection: seeing the whole and dividing it in two equal parts. It means less measuring and a more streamlined process.
Flaky salt: All desserts benefit from salt and the chocolate chip cookie might be the best example of that. Kids will sprinkle flaky salt over top of the freshly baked cookies. If you don’t have flaky salt on hand (I love Maldon) any salt will do. Putting that finishing touch adds a level of flair that makes kids feel like real chefs.
Tip: Sprinkle from high and don’t be stingy.

Traditional chocolate chip cookie recipes rely on creaming room-temperature butter with sugar using an electric mixer. This step incorporates air into the batter and creates a specific texture. But that method requires planning ahead as you’re working with softened butter and an additional appliance.
For Nibblings, accessibility matters. Kids (and grownups) don’t always think hours ahead. And I want this recipe to be universally doable with simple tools. So instead, we melt the butter. This changes the texture slightly. But after extensive testing, this recipe produces a deeply flavorful, chewy cookie, without requiring forethought or specialized equipment.
Towing the line between accessibility and challenge is an important part of all learning. So while I want things to be doable, I also want kids to push themselves and put in effort. How kids use chocolate bars in this recipe is the perfect example. There is extra effort because kids need to break the pieces themselves, rather than using chips, but I’ve cut out the risky work of cutting chocolate and recommend kids use their hands instead. The chocolate taste is prize enough, but the effort enhances the reward too. When we put more effort into something, we often feel more pride in it.
Whenever possible, this recipe relies on a single teaspoon measurement tool. Using one consistent measuring tool streamlines the recipe so there are fewer dirty spoons and less chance of a measuring mistake. I even have kids add 1 teaspoon of vanilla last so that their spoon is not wet and dirty for the dry ingredients. They can add the salt, then the baking soda, and then the vanilla without having to wash it between uses. The goal is to remove barriers wherever possible.
Lastly, we’re baking with two trays, which means you’ll need to switch them at the halfway mark. Instead of writing “switch the pans halfway through,” I’ve structured the recipe so kids set two distinct timers: one for the first half of the bake, and one for the second. Breaking it into clear, separate steps keeps the task concrete and easier to follow. It does mean there’s a small role for the grown-up, but it’s a brief moment of support in an otherwise fully independent bake.

The trickiest part of this recipe is breaking the chocolate into chunks. It takes time, patience, and a little bit of muscle. But with a thin enough bar, it’s easy enough. If your kid starts to feel frustrated, remind them that this step is supposed to take time. This is a moment to slow down and stick with it. Effort here leads to those beautiful chocolate puddles later. You can lend a hand if needed or chop a few pieces to help pick up the pace, but try to let them do as much as they can independently. A little struggle is part of the learning.
Preview the recipe together and flag any steps where your child might need help.
Encourage your kid to try independently first and come to you when they need support; this builds confidence and problem-solving skills.
Look out for the “Grab Your Grown-Up” moments. If your child is ready to handle the oven safely, let them know. Relax and enjoy stepping back!
Mixing takes time, trust the process:
Mixing batter can be tricky. This is a wonderful moment to teach perseverance and problem solving. Some ways to support your kid:
Set a short “mixing timer” (for example, 1 minute) and take turns mixing until it goes off.
Switch tools if needed. Hands are a great mixing tool!
Show your kid how to steady the bowl with their non-dominant hand while mixing with the other.
Place a kitchen towel under the bowl to keep it from sliding.


yum! just made these and I loved how the recipe was written - so clear and easy to follow!
I love how cutting the butter provides a way to use fractions irl!